A tour of the Project Editor
In the Project Editor, you design a project on the canvas, with your slides, layers, and settings around it. This tour shows where everything is, and how to arrange the editor to suit you.
On this page
The regions of the editor
The toolbar runs across the top of the editor. Below the toolbar, in the middle, the slides list sits above the canvas. The layers list is on the left, and the sidebar with the settings is on the right, with Save and Publish in the bottom right corner of the editor.
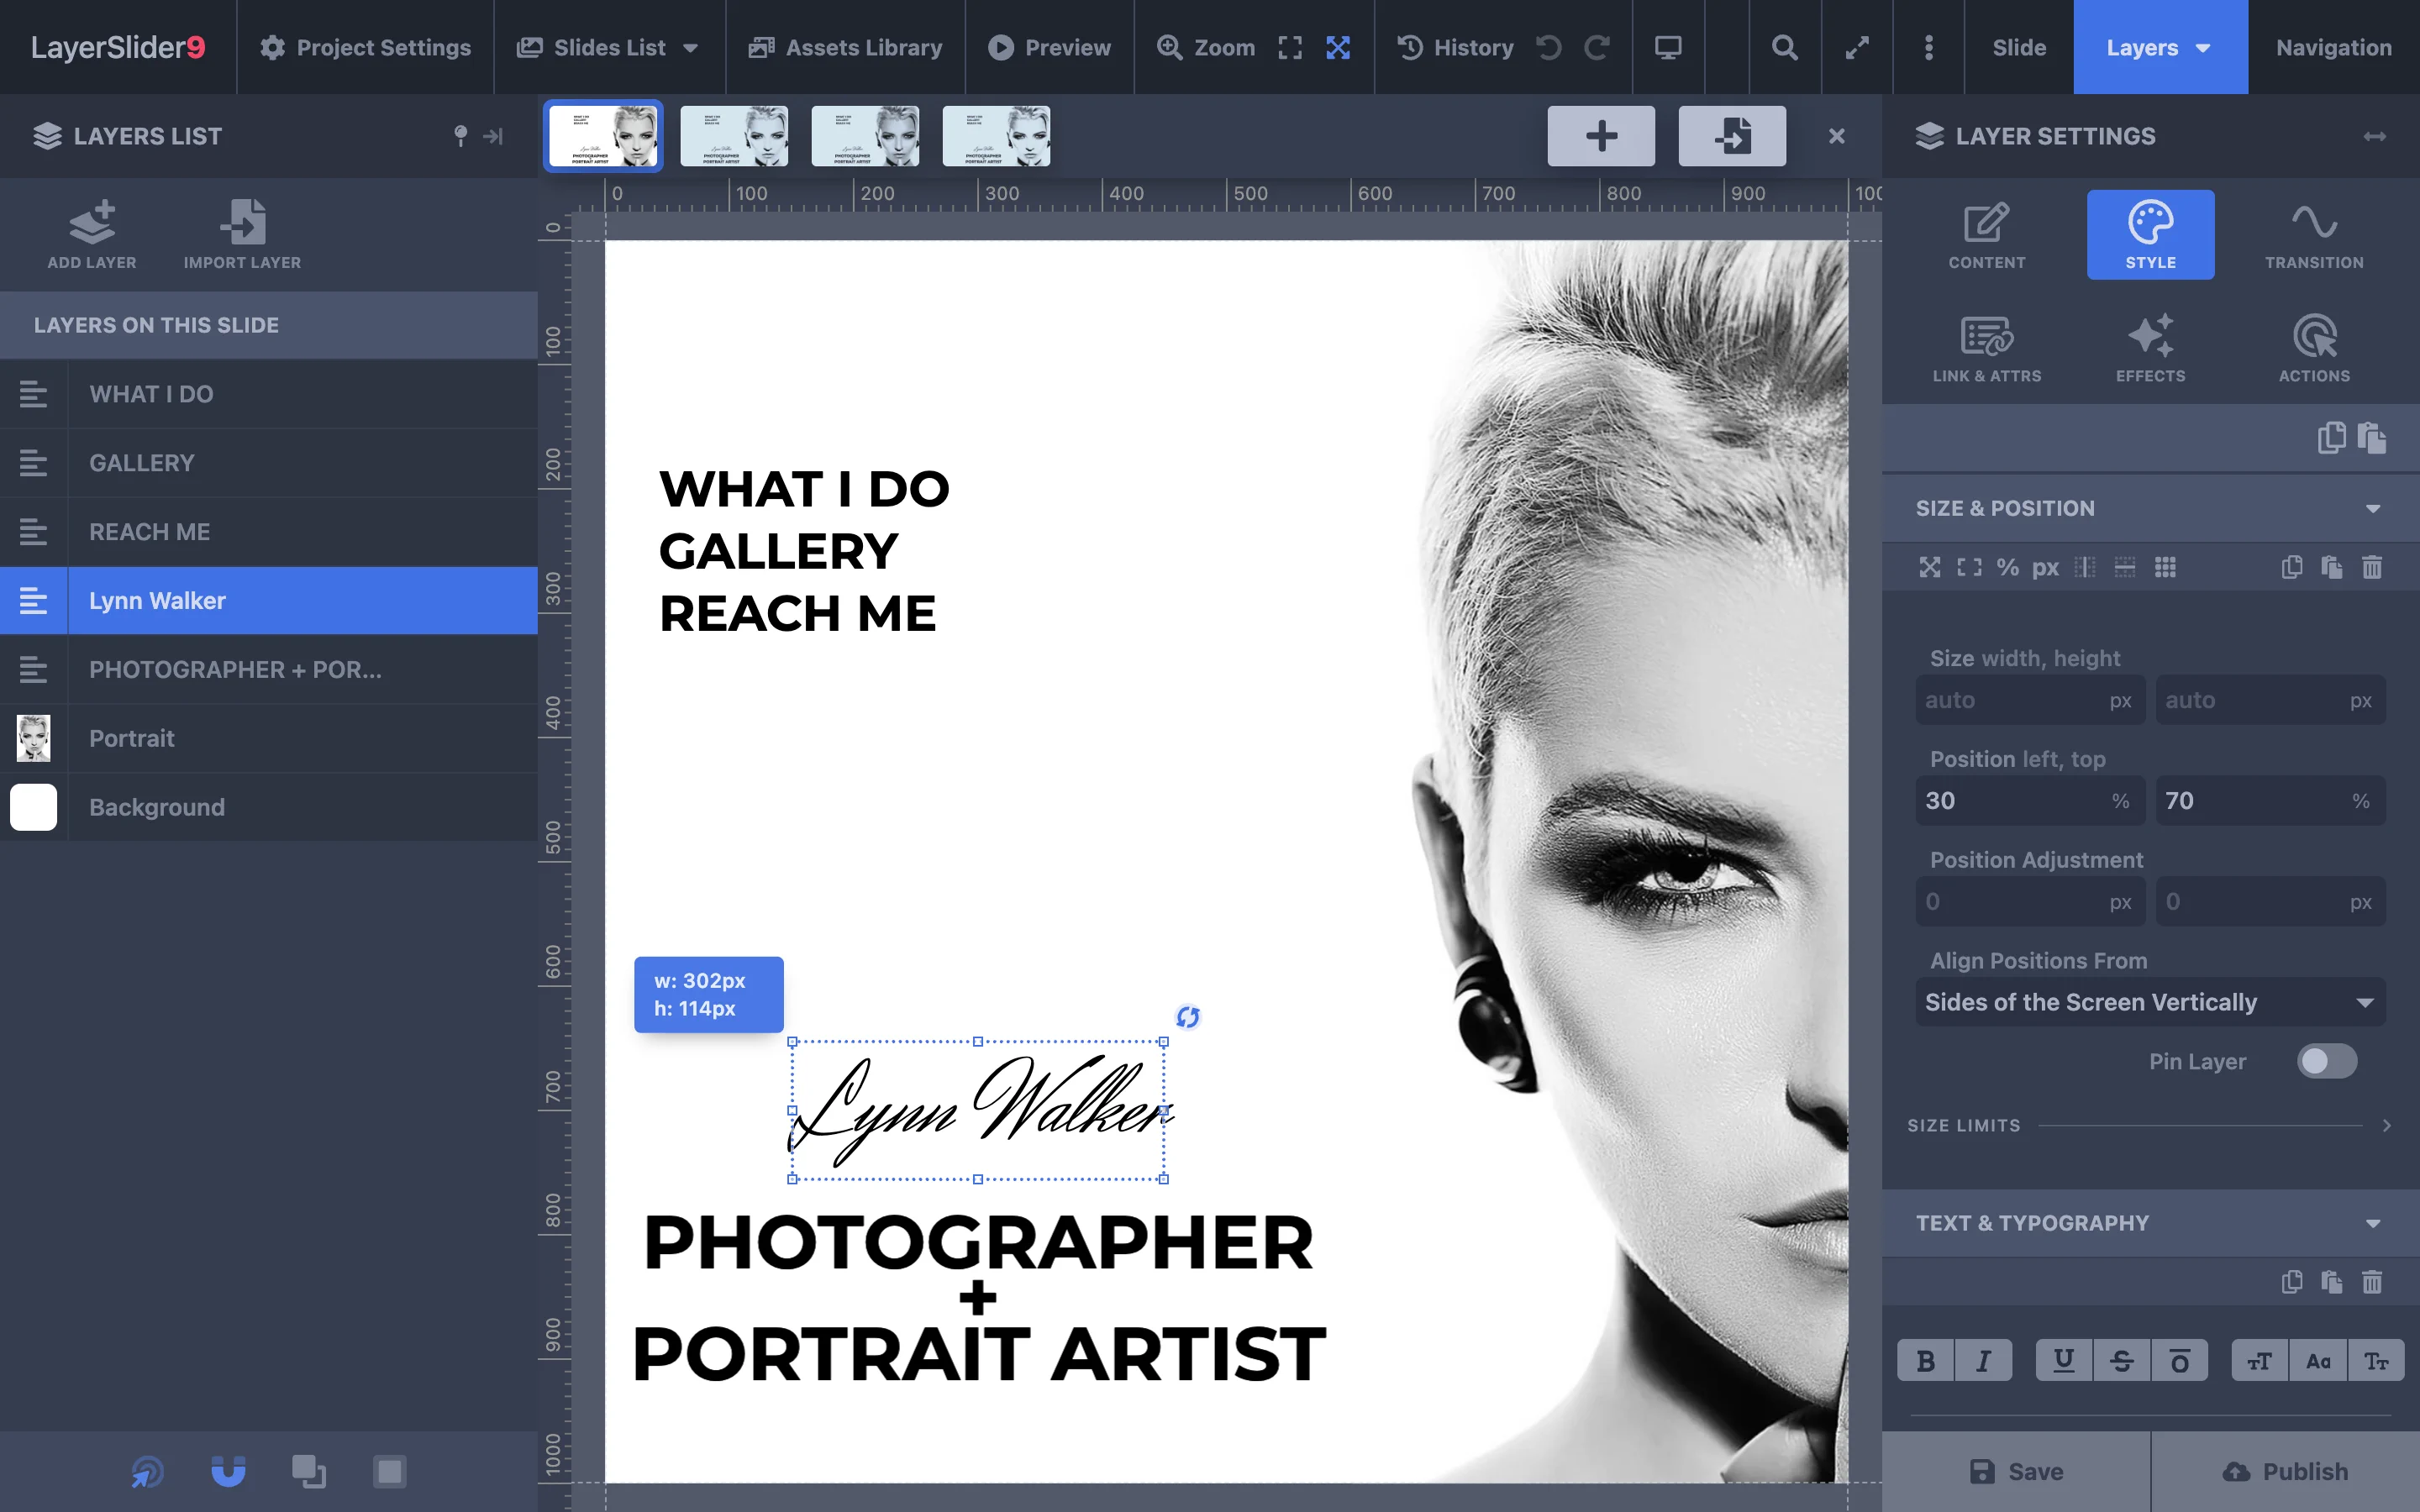
- Toolbar
- Slides List
- Canvas
- Layers List
- Sidebar
- Save and Publish
The toolbar
Project Settings opens the Project Settings window, where you set up the project itself: its size and layout, its appearance, and the way the slideshow plays.
To take back the last change, click Undo, next to the History menu, which lists your changes to the slide you’re editing. You can also press CtrlZ.
To find a setting or run a common action, such as adding a layer, click Search, in the top right corner of the editor. You can also press CtrlE.
The ⋮ menu of the toolbar, in the same corner, has Guided Tours, where you can take the Interface Walkthrough any time. Keyboard Shortcuts there lists the editor’s shortcuts and lets you change them, and Revisions brings back an earlier version of the project.
To go back to your projects on the LayerSlider dashboard, click the LayerSlider logo, in the top left corner of the editor.
The slides list
The slides list shows all the slides of your project. Click a slide to open it on the canvas, and drag it to change the order of the slides. Right-click a slide for its most common actions. To add a slide, click the + button after the slides.
Slides List, in the toolbar, opens the list as a panel, where you can also name the slides.
The canvas
The canvas shows the slide you’re editing, with every layer in place. Click a layer there to select it, and drag it to move it. To set the layer’s values precisely, click the Layers tab of the sidebar.
The Zoom menu, in the toolbar, shows the canvas larger or smaller, without changing the project’s size.
The layers list
The layers list shows every layer of the slide you’re editing. A layer is anything you place on a slide: text, an image, a button, a video, a shape, and more.
The list is also the stacking order: the layer at the top is in front of all the others. To change the order, drag a layer up or down by its thumbnail. To add a layer, click the Add Layer tile at the top of the list.
The sidebar
The sidebar shows the settings of whatever you’re working on, and the three tabs above it decide what that is. The Slide tab opens Slide Settings, the settings of the slide you’re editing. The Layers tab opens Layer Settings, the settings of the selected layers.
The Navigation tab opens the Navigation Editor, where you choose which elements appear on or beside your project. While that tab is open, the layers list shows those elements in place of the layers.
To see what a setting does, move the pointer over the setting and click the ⋮ button that appears.
To keep your work as a draft that only the editor shows, click Save. You can also press CtrlS. To put your changes on your site, click Publish. You can also press CtrlShift ⇧S.
The timeline and the preview
The Preview menu, in the toolbar, plays your work. Slide plays the slide once, Layer plays the selected layer again and again, and Project shows the whole project as if it were already on a page.
Timeline, in the same menu, opens the timeline at the bottom of the editor. The timeline shows the slide’s animations as bars, so you can see how they line up and where they overlap.
To leave a preview or the timeline, press Esc.
Arranging the editor
To give the canvas more room, click Pin sidebar, in the top right corner of the layers list. The list hides beyond the left edge, and it slides out while the pointer rests on the narrow strip it leaves. To keep the list in place again, click Pin sidebar once more. You can also press CtrlB.
Move sidebar to the other side, in the same corner, puts the layers list on the right, beside the settings, where it shows while the Layers tab is open. To move the list back, click the same icon again.
To hide the slides list, click Unpin slides list, at its right end. Slides List, in the toolbar, then opens the panel when you need it. Pin slides list, in the top right corner of the panel, brings the list back above the canvas.
To make the sidebar wider, click Expand sidebar, in the top right corner of the sidebar.
The editor keeps this arrangement of its panels in your browser and uses it in every project of your site.
To give the editor the entire display, click Full screen, next to Search. You can also press CtrlShift ⇧F. The same button takes you back to the normal view.
Interface Settings, in the ⋮ menu of the toolbar, has switches that turn the editor’s tooltips, keyboard shortcuts, and other features on or off.